google-cloud documentation
Deploy Gemma 7B with TGI DLC from GCS on Vertex AI
Deploy Gemma 7B with TGI DLC from GCS on Vertex AI
Gemma is a family of lightweight, state-of-the-art open models built from the same research and technology used to create the Gemini models, developed by Google DeepMind and other teams across Google. Text Generation Inference (TGI) is a toolkit developed by Hugging Face for deploying and serving LLMs, with high performance text generation. And, Google Vertex AI is a Machine Learning (ML) platform that lets you train and deploy ML models and AI applications, and customize large language models (LLMs) for use in your AI-powered applications.
This example showcases how to deploy any supported text-generation model, in this case google/gemma-7b-it, downloaded from the Hugging Face Hub and uploaded to a Google Cloud Storage (GCS) Bucket, on Vertex AI using the Hugging Face DLC for TGI available in Google Cloud Platform (GCP).
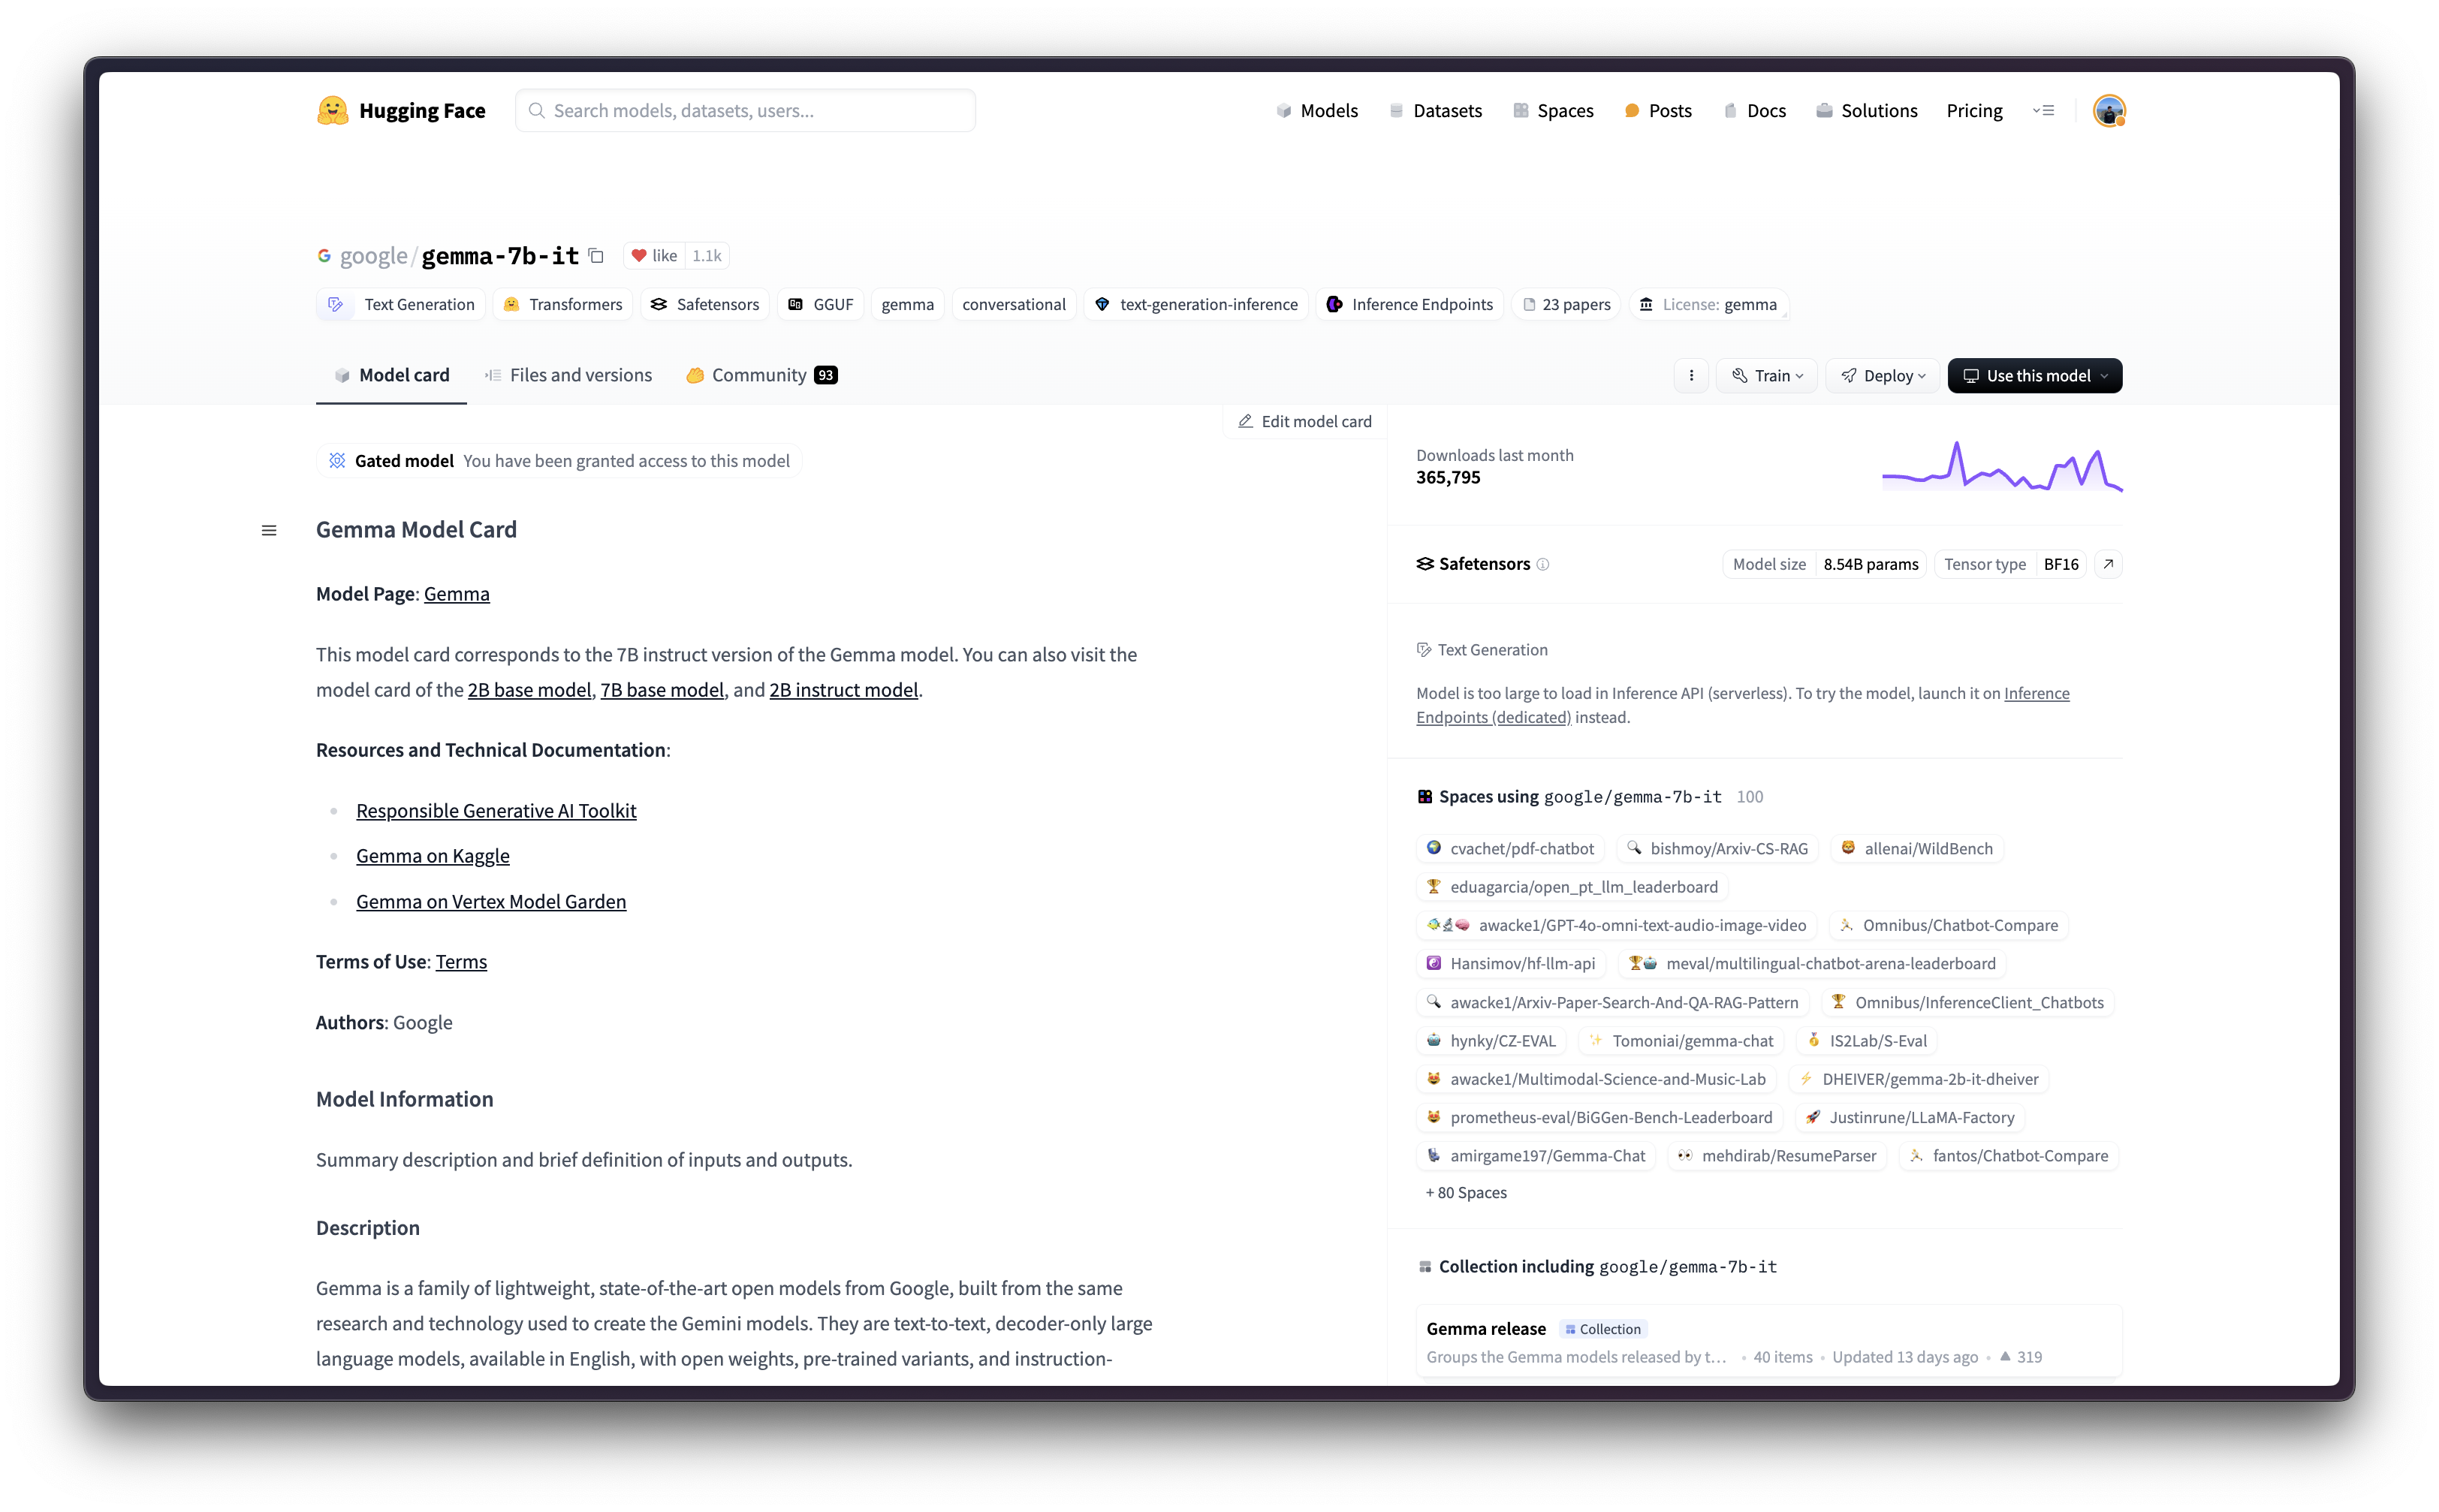
Setup / Configuration
First, you need to install gcloud in your local machine, which is the command-line tool for Google Cloud, following the instructions at Cloud SDK Documentation - Install the gcloud CLI.
Then, you also need to install the google-cloud-aiplatform Python SDK, required to programmatically create the Vertex AI model, register it, acreate the endpoint, and deploy it on Vertex AI.
!pip install --upgrade --quiet google-cloud-aiplatform
Optionally, to ease the usage of the commands within this tutorial, you need to set the following environment variables for GCP:
%env PROJECT_ID=your-project-id
%env LOCATION=your-location
%env BUCKET_URI=gs://your-bucket
%env ARTIFACT_NAME=google--gemma-7b-it
%env CONTAINER_URI=us-docker.pkg.dev/deeplearning-platform-release/gcr.io/huggingface-text-generation-inference-cu124.2-3.ubuntu2204.py311
Then you need to login into your GCP account and set the project ID to the one you want to use to register and deploy the models on Vertex AI.
!gcloud auth login
!gcloud auth application-default login  # For local development
!gcloud config set project $PROJECT_ID
Once you are logged in, you need to enable the necessary service APIs in GCP, such as the Vertex AI API, the Compute Engine API, and Google Container Registry related APIs.
!gcloud services enable aiplatform.googleapis.com
!gcloud services enable compute.googleapis.com
!gcloud services enable container.googleapis.com
!gcloud services enable containerregistry.googleapis.com
!gcloud services enable containerfilesystem.googleapis.com
Optional: Create bucket and upload model from Hub in GCS
Unless you already have a GCS Bucket with the artifact that you want to serve, please follow the instructions below in order to create a new bucket and download and upload the model weights into it.
To create the bucket on Google Cloud Storage (GCS), you first need to ensure that the name is unique for the new bucket or if a bucket with the same name already exists. To do so, both the gsutil SDK and the crcmod Python package need to be installed in advance as follows:
!gcloud components install gsutil
!pip install --upgrade --quiet crcmod
Then you can check whether the bucket exists in GCS, and create it if it doesn’t, with the following bash script:
%%bash

# Parse the bucket from the provided $BUCKET_URI path i.e. given gs://bucket-name/dir, extract bucket-name
BUCKET_NAME=$(echo $BUCKET_URI | cut -d'/' -f3)
# Check if the bucket exists, if not create it
if [ -z "$(gsutil ls | grep gs://$BUCKET_NAME)" ]; then
    gcloud storage buckets create gs://$BUCKET_NAME --project=$PROJECT_ID --location=$LOCATION --default-storage-class=STANDARD --uniform-bucket-level-access
fi
If either the bucket was created or if the bucket existed in advance, you can already upload google/gemma-7b-it from either the Hugging Face Hub, or local storage.
Artifact from disk / local storage
If the model is available locally, e.g. under the Hugging Face cache path at ~/.cache/huggingface/hub/models--google--gemma-7b-it/snapshots/8adab6a35fdbcdae0ae41ab1f711b1bc8d05727e, you should run the following script to upload it to the GCS Bucket.
%%bash
# Upload the model to Google Cloud Storage
LOCAL_DIR=~/.cache/huggingface/hub/models--google--gemma-7b-it/snapshots/8adab6a35fdbcdae0ae41ab1f711b1bc8d05727e
if [ -d "$LOCAL_DIR" ]; then
    gsutil -o GSUtil:parallel_composite_upload_threshold=150M -m cp -r $LOCAL_DIR/* $BUCKET_URI/$ARTIFACT_NAME
fi
Artifact from Hugging Face Hub
Alternatively, you can also upload the model to the GCS Bucket from the Hugging Face Hub. As google/gemma-7b-it is a gated model, you need to login into your Hugging Face Hub account with a read-access token either fine-grained with access to the gated model, or just overall read-access to your account.
More information on how to generate a read-only access token for the Hugging Face Hub in the instructions at https://huggingface.co./docs/hub/en/security-tokens.
!pip install "huggingface_hub[hf_transfer]" --upgrade --quietfrom huggingface_hub import interpreter_login
interpreter_login()After huggingface_hub installation and login are completed, you can run the following bash script to download the model locally within a temporary directory, and then upload those to the GCS Bucket.
%%bash
# Ensure the necessary environment variables are set
export HF_HUB_ENABLE_HF_TRANSFER=1

# # Create a local directory to store the downloaded models
LOCAL_DIR="tmp/google--gemma-7b-it"
mkdir -p $LOCAL_DIR

# # Download models from HuggingFace, excluding certain file types
huggingface-cli download google/gemma-7b-it --exclude "*.bin" "*.pth" "*.gguf" ".gitattributes" --local-dir $LOCAL_DIR

# Upload the downloaded models to Google Cloud Storage
gsutil -o GSUtil:parallel_composite_upload_threshold=150M -m cp -e -r $LOCAL_DIR/* $BUCKET_URI/$ARTIFACT_NAME

# Remove all files and hidden files in the target directory
rm -rf tmp/
To see the end to end script, please check ./scripts/upload_model_to_gcs.sh within the root directory of this repository.
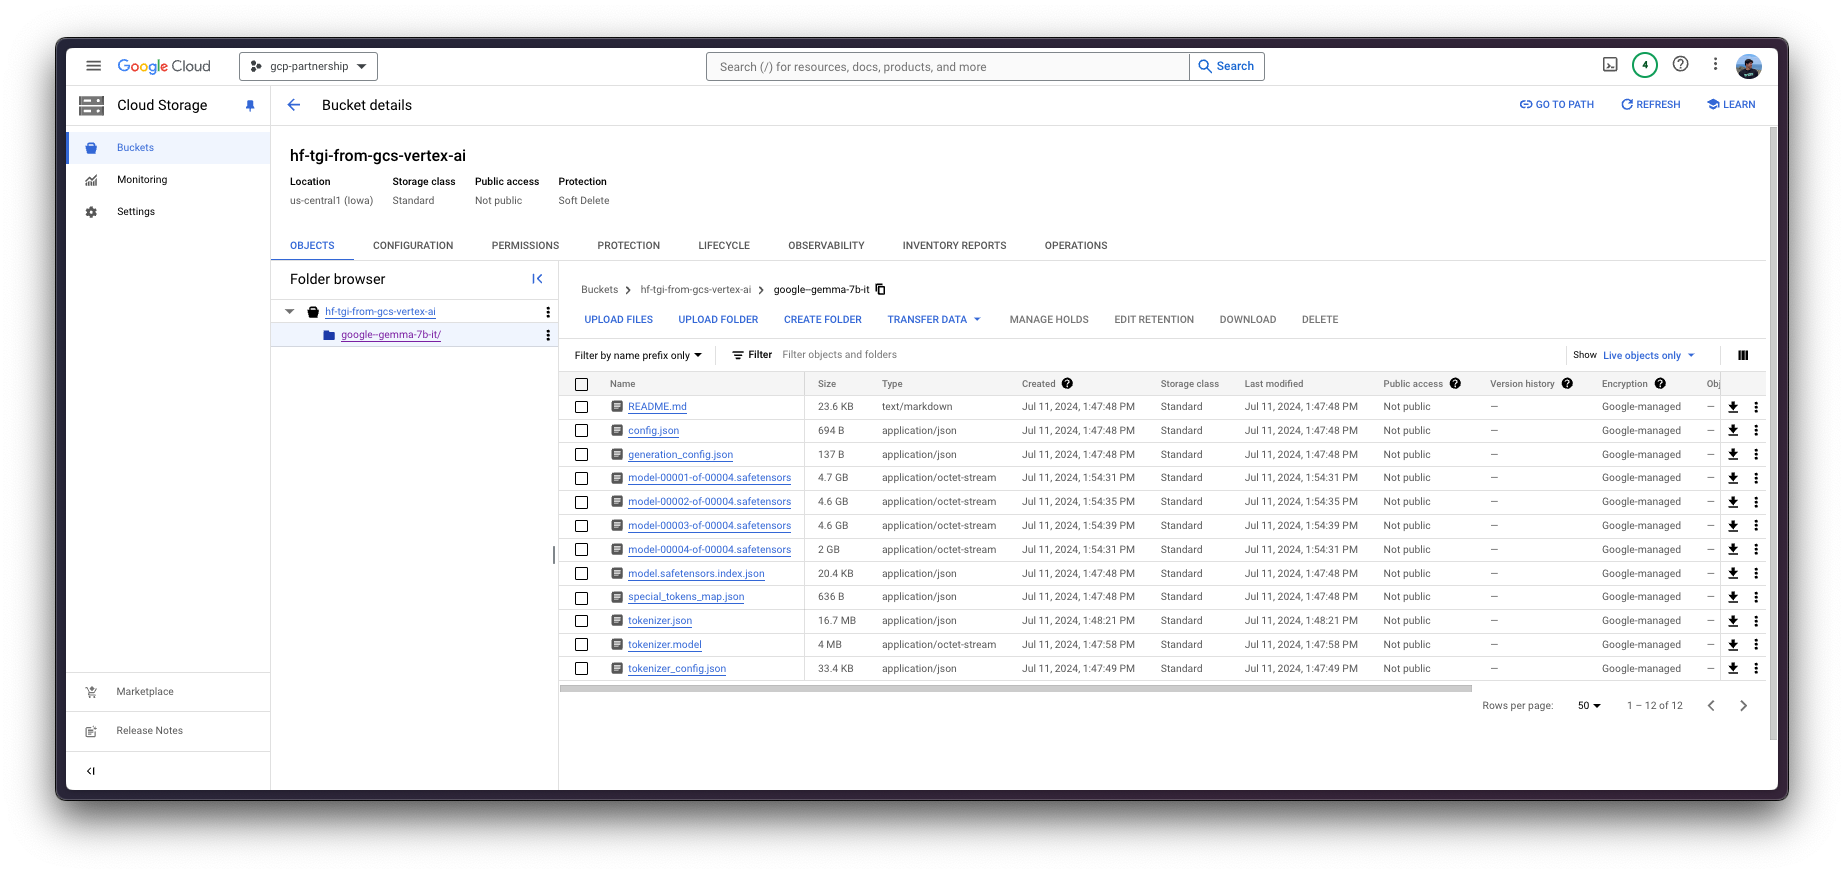
Register model on Vertex AI
Once everything is set up, you can already initialize the Vertex AI session via the google-cloud-aiplatform Python SDK as follows:
import os
from google.cloud import aiplatform

aiplatform.init(
    project=os.getenv("PROJECT_ID"),
    location=os.getenv("LOCATION"),
    staging_bucket=os.getenv("BUCKET_URI"),
)
Then you can already “upload” the model i.e. register the model on Vertex AI. It is not an upload per se, since the model will be automatically downloaded from the GCS Bucket URI on startup, so what is uploaded is only the configuration, not the model weights.
Before going into the code, let’s quickly review the arguments provided to the upload method:
display_nameis the name that will be shown in the Vertex AI Model Registry.artifact_uriis the path to the directory with the artifact within the GCS Bucket.serving_container_image_uriis the location of the Hugging Face DLC for TGI that will be used for serving the model.serving_container_environment_variablesare the environment variables that will be used during the container runtime, so these are aligned with the environment variables defined bytext-generation-inference, which are analog to thetext-generation-launcherarguments. Additionally, the Hugging Face DLCs for TGI also capture theAIP_environment variables from Vertex AI as in Vertex AI Documentation - Custom container requirements for prediction.NUM_SHARDis the number of shards to use if you don’t want to use all GPUs on a given machine e.g. if you have two GPUs but you just want to use one for TGI thenNUM_SHARD=1, otherwise it matches theCUDA_VISIBLE_DEVICES.MAX_INPUT_TOKENSis the maximum allowed input length (expressed in number of tokens), the larger it is, the larger the prompt can be, but also more memory will be consumed.MAX_TOTAL_TOKENSis the most important value to set as it defines the “memory budget” of running clients requests, the larger this value, the larger amount each request will be in your RAM and the less effective batching can be.MAX_BATCH_PREFILL_TOKENSlimits the number of tokens for the prefill operation, as it takes the most memory and is compute bound, it is interesting to limit the number of requests that can be sent.HUGGING_FACE_HUB_TOKENis the Hugging Face Hub token, required asgoogle/gemma-7b-itis a gated model.
(optional)
serving_container_portsis the port where the Vertex AI endpoint will be exposed, by default 8080.
For more information on the supported aiplatform.Model.upload arguments, check its Python reference at https://cloud.google.com/python/docs/reference/aiplatform/latest/google.cloud.aiplatform.Model#google_cloud_aiplatform_Model_upload.
Starting from TGI 2.3 DLC i.e. us-docker.pkg.dev/deeplearning-platform-release/gcr.io/huggingface-text-generation-inference-cu124.2-3.ubuntu2204.py311, and onwards, you can set the environment variable value MESSAGES_API_ENABLED="true" to deploy the Messages API on Vertex AI, otherwise, the Generate API will be deployed instead.
model = aiplatform.Model.upload(
    display_name="google--gemma-7b-it",
    artifact_uri=f"{os.getenv('BUCKET_URI')}/{os.getenv('ARTIFACT_NAME')}",
    serving_container_image_uri=os.getenv("CONTAINER_URI"),
    serving_container_environment_variables={
        "NUM_SHARD": "1",
        "MAX_INPUT_TOKENS": "512",
        "MAX_TOTAL_TOKENS": "1024",
        "MAX_BATCH_PREFILL_TOKENS": "1512",
    },
    serving_container_ports=[8080],
)
model.wait()
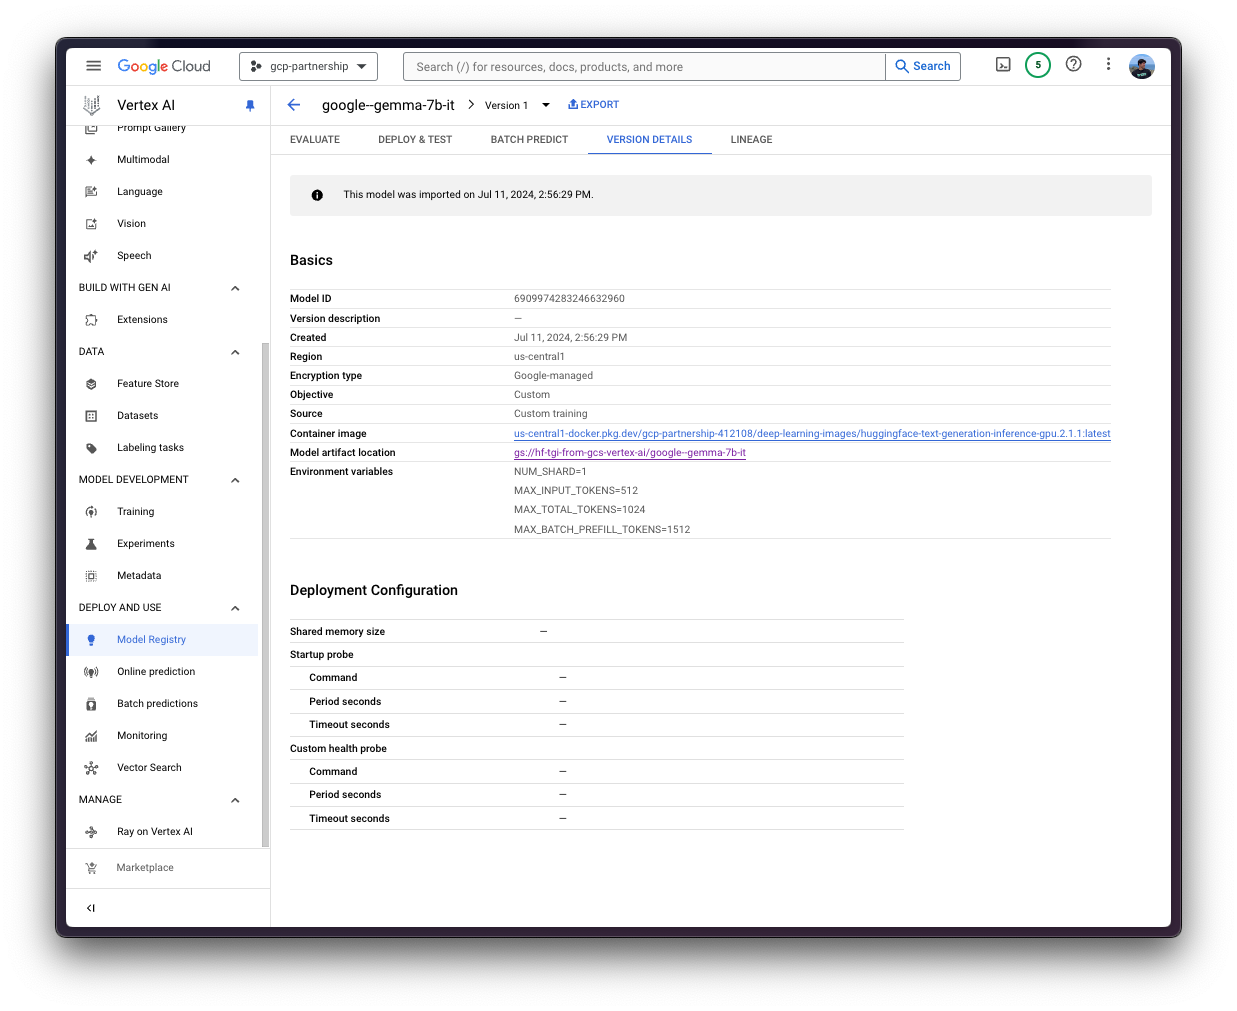
Deploy model on Vertex AI
After the model is registered on Vertex AI, you need to define the endpoint that you want to deploy the model to, and then link the model deployment to that endpoint resource.
To do so, you need to call the method aiplatform.Endpoint.create to create a new Vertex AI endpoint resource (which is not linked to a model or anything usable yet).
endpoint = aiplatform.Endpoint.create(display_name="google--gemma-7b-it-endpoint")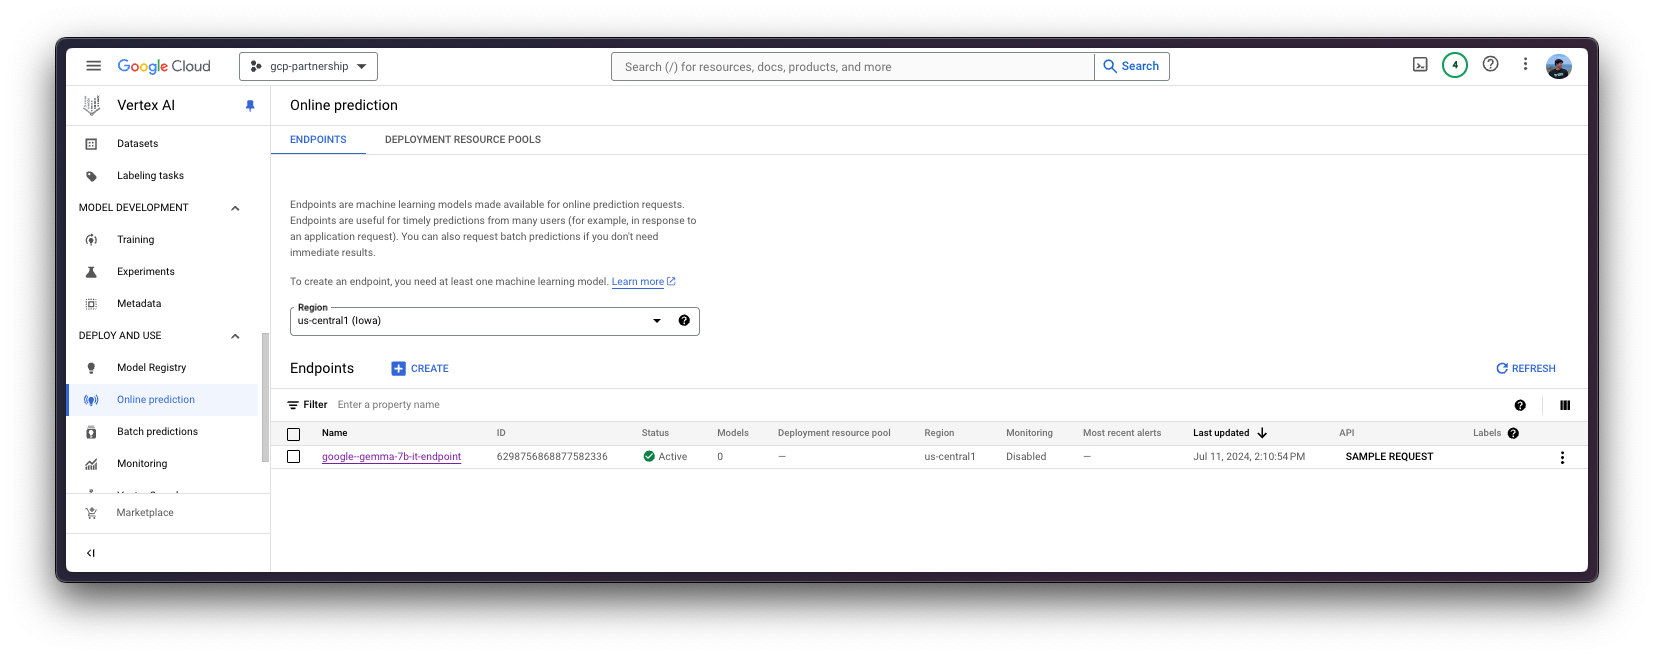
Now you can deploy the registered model in an endpoint on Vertex AI.
The deploy method will link the previously created endpoint resource with the model that contains the configuration of the serving container, and then, it will deploy the model on Vertex AI in the specified instance.
Before going into the code, let’s quicklyl review the arguments provided to the deploy method:
endpointis the endpoint to deploy the model to, which is optional, and by default will be set to the model display name with the_endpointsuffix.machine_type,accelerator_typeandaccelerator_countare arguments that define which instance to use, and additionally, the accelerator to use and the number of accelerators, respectively. Themachine_typeand theaccelerator_typeare tied together, so you will need to select an instance that supports the accelerator that you are using and vice-versa. More information about the different instances at Compute Engine Documentation - GPU machine types, and about theaccelerator_typenaming at Vertex AI Documentation - MachineSpec.
For more information on the supported aiplatform.Model.deploy arguments, you can check its Python reference at https://cloud.google.com/python/docs/reference/aiplatform/latest/google.cloud.aiplatform.Model#google_cloud_aiplatform_Model_deploy.
deployed_model = model.deploy(
    endpoint=endpoint,
    machine_type="g2-standard-4",
    accelerator_type="NVIDIA_L4",
    accelerator_count=1,
)WARNING: The Vertex AI endpoint deployment via the deploy method may take from 15 to 25 minutes.
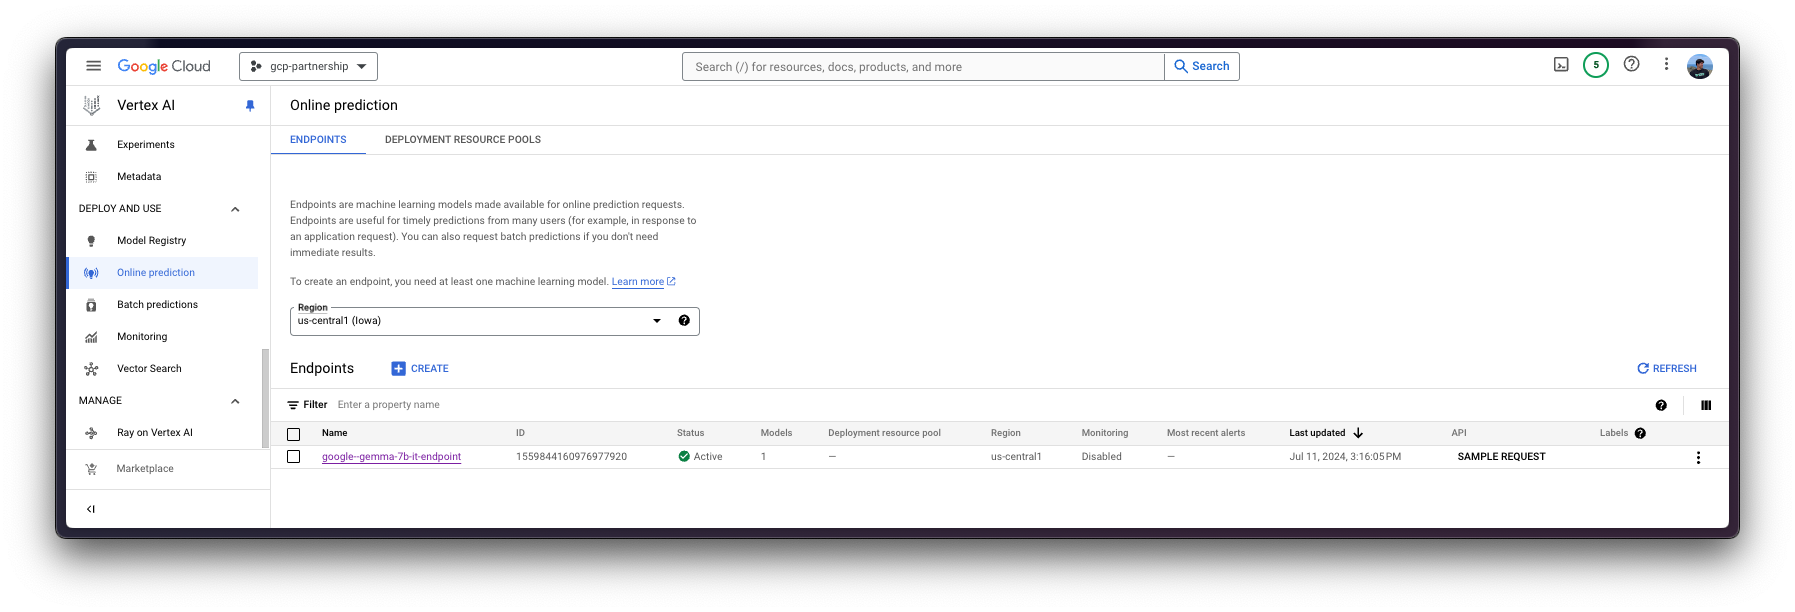
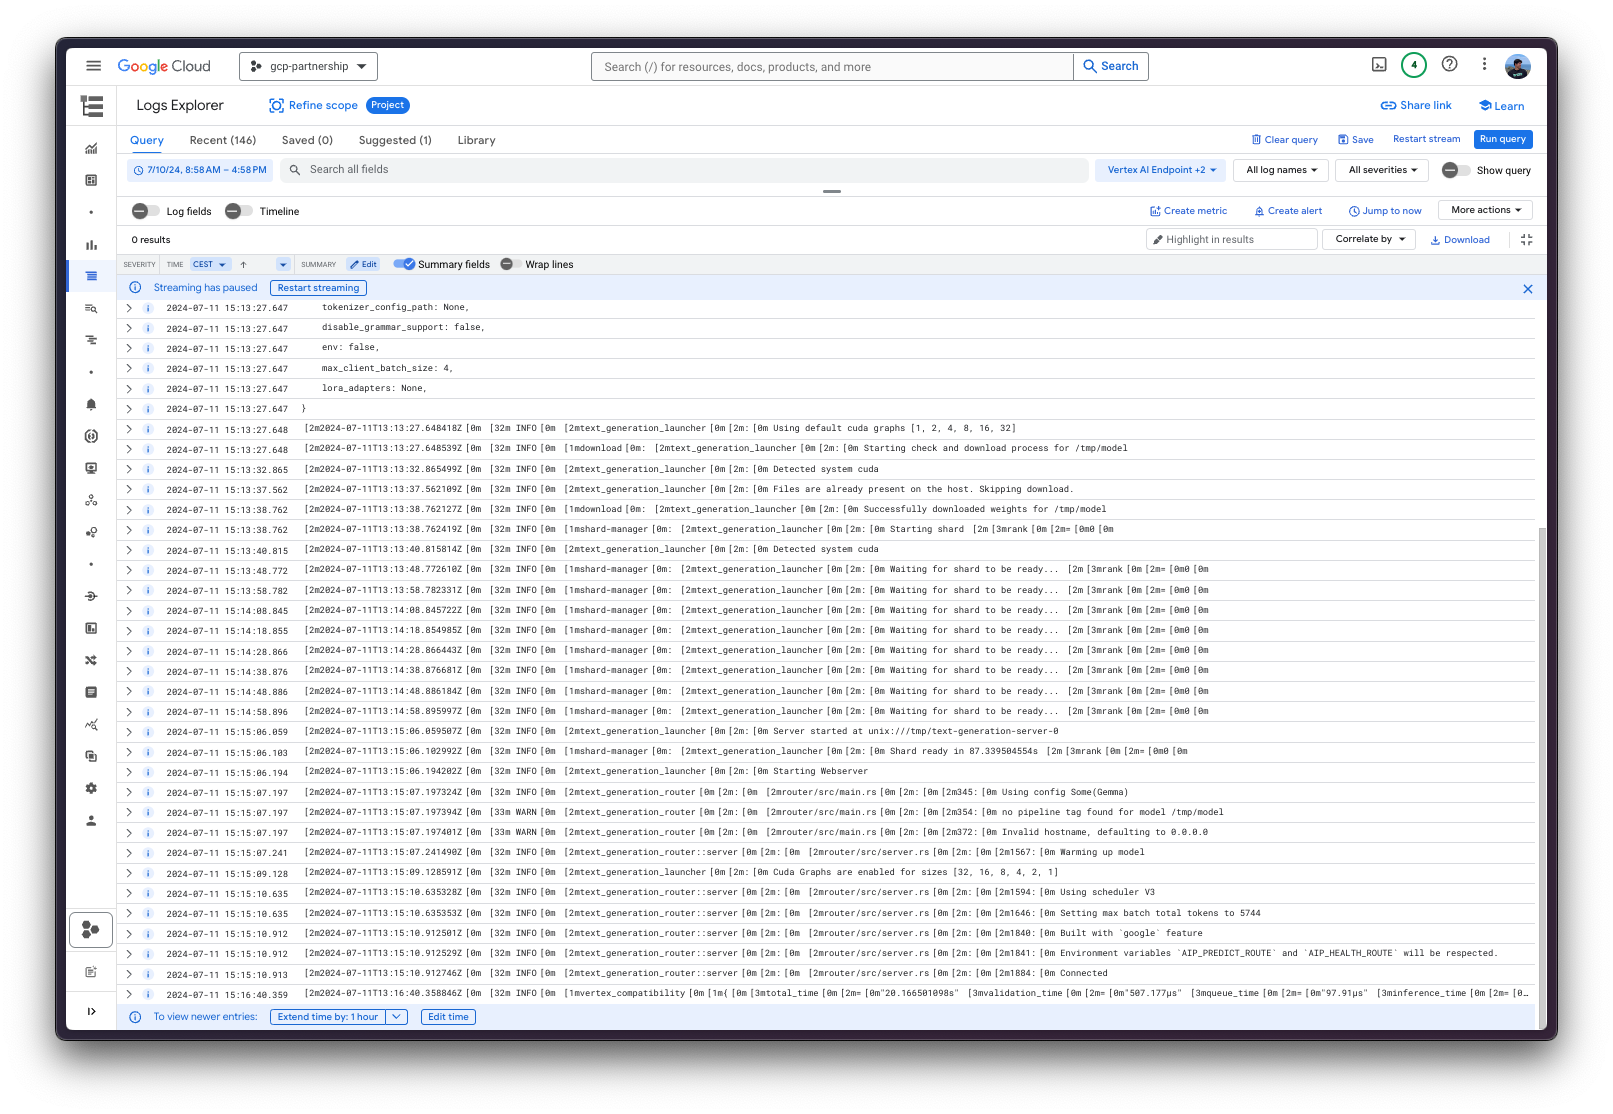
Online predictions on Vertex AI
Finally, you can run the online predictions on Vertex AI using the predict method, which will send the requests to the running endpoint in the /predict route specified within the container following Vertex AI I/O payload formatting.
As you are serving a text-generation model, you will need to make sure that the chat template, if any, is applied correctly to the input conversation; meaning that transformers need to be installed so as to instantiate the tokenizer for google/gemma-7b-it and run the apply_chat_template method over the input conversation before sending the input within the payload to the Vertex AI endpoint.
!pip install --upgrade --quiet transformers
After the installation is complete, the following snippet will apply the chat template to the conversation:
from huggingface_hub import get_token
from transformers import AutoTokenizer

tokenizer = AutoTokenizer.from_pretrained("google/gemma-7b-it", token=get_token())

messages = [
    {"role": "user", "content": "What's Deep Learning?"},
]

inputs = tokenizer.apply_chat_template(
    messages,
    tokenize=False,
    add_generation_prompt=True,
)
# <bos><start_of_turn>user\nWhat's Deep Learning?<end_of_turn>\n<start_of_turn>model\n
Which is what you will be sending within the payload to the deployed Vertex AI Endpoint, as well as the generation parameters as in https://huggingface.co./docs/huggingface_hub/main/en/package_reference/inference_client#huggingface_hub.InferenceClient.text_generation.
Via Python
Within the same session
If you are willing to run the online prediction within the current session, you can send requests programmatically via the aiplatform.Endpoint (returned by the aiplatform.Model.deploy method) as in the following snippet:
output = deployed_model.predict(
    instances=[
        {
            "inputs": "<bos><start_of_turn>user\nWhat's Deep Learning?<end_of_turn>\n<start_of_turn>model\n",
            "parameters": {
                "max_new_tokens": 256,
                "do_sample": True,
                "top_p": 0.95,
                "temperature": 1.0,
            },
        },
    ]
)
print(output.predictions[0])
Producing the following output:
Prediction(predictions=['\n\nDeep learning is a type of machine learning that uses artificial neural networks to learn from large amounts of data, making it a powerful tool for various tasks, including image recognition, natural language processing, and speech recognition.\n\n**Key Concepts:**\n\n* **Artificial Neural Networks (ANNs):** Structures that mimic the interconnected neurons in the brain.\n* **Deep Learning Architectures:** Multi-layered ANNs that learn hierarchical features from data.\n* **Transfer Learning:** Reusing learned features from one task to improve performance on another.\n\n**Types of Deep Learning:**\n\n* **Supervised Learning:** Models are trained on labeled data, where inputs are paired with corresponding outputs.\n* **Unsupervised Learning:** Models learn patterns from unlabeled data, such as clustering or dimensionality reduction.\n* **Reinforcement Learning:** Models learn through trial-and-error by interacting with an environment to optimize a task.\n\n**Benefits:**\n\n* **High Accuracy:** Deep learning models can achieve high accuracy on complex tasks.\n* **Adaptability:** Deep learning models can adapt to new data and tasks.\n* **Scalability:** Deep learning models can handle large amounts of data.\n\n**Applications:**\n\n* Image recognition\n* Natural language processing (NLP)\n'], deployed_model_id='***', metadata=None, model_version_id='1', model_resource_name='projects/***/locations/us-central1/models/***', explanations=None)From a different session
If the Vertex AI Endpoint was deployed in a different session and you want to use it but don’t have access to the deployed_model variable returned by the aiplatform.Model.deploy method as in the previous section; you can also run the following snippet to instantiate the deployed aiplatform.Endpoint via its resource name as projects/{PROJECT_ID}/locations/{LOCATION}/endpoints/{ENDPOINT_ID}.
You will need to either retrieve the resource name i.e. the projects/{PROJECT_ID}/locations/{LOCATION}/endpoints/{ENDPOINT_ID} URL yourself via the Google Cloud Console, or just replace the ENDPOINT_ID below that can either be found via the previously instantiated endpoint as endpoint.id or via the Google Cloud Console under the Online predictions where the endpoint is listed.
import os
from google.cloud import aiplatform

aiplatform.init(project=os.getenv("PROJECT_ID"), location=os.getenv("LOCATION"))

endpoint_display_name = "google--gemma-7b-it-endpoint"  # TODO: change to your endpoint display name

# Iterates over all the Vertex AI Endpoints within the current project and keeps the first match (if any), otherwise set to None
ENDPOINT_ID = next(
    (endpoint.name for endpoint in aiplatform.Endpoint.list() if endpoint.display_name == endpoint_display_name), None
)
assert ENDPOINT_ID, (
    "`ENDPOINT_ID` is not set, please make sure that the `endpoint_display_name` is correct at "
    f"https://console.cloud.google.com/vertex-ai/online-prediction/endpoints?project={os.getenv('PROJECT_ID')}"
)

endpoint = aiplatform.Endpoint(
    f"projects/{os.getenv('PROJECT_ID')}/locations/{os.getenv('LOCATION')}/endpoints/{ENDPOINT_ID}"
)
output = endpoint.predict(
    instances=[
        {
            "inputs": "<bos><start_of_turn>user\nWhat's Deep Learning?<end_of_turn>\n<start_of_turn>model\n",
            "parameters": {
                "max_new_tokens": 128,
                "do_sample": True,
                "top_p": 0.95,
                "temperature": 0.7,
            },
        },
    ],
)
print(output.predictions[0])
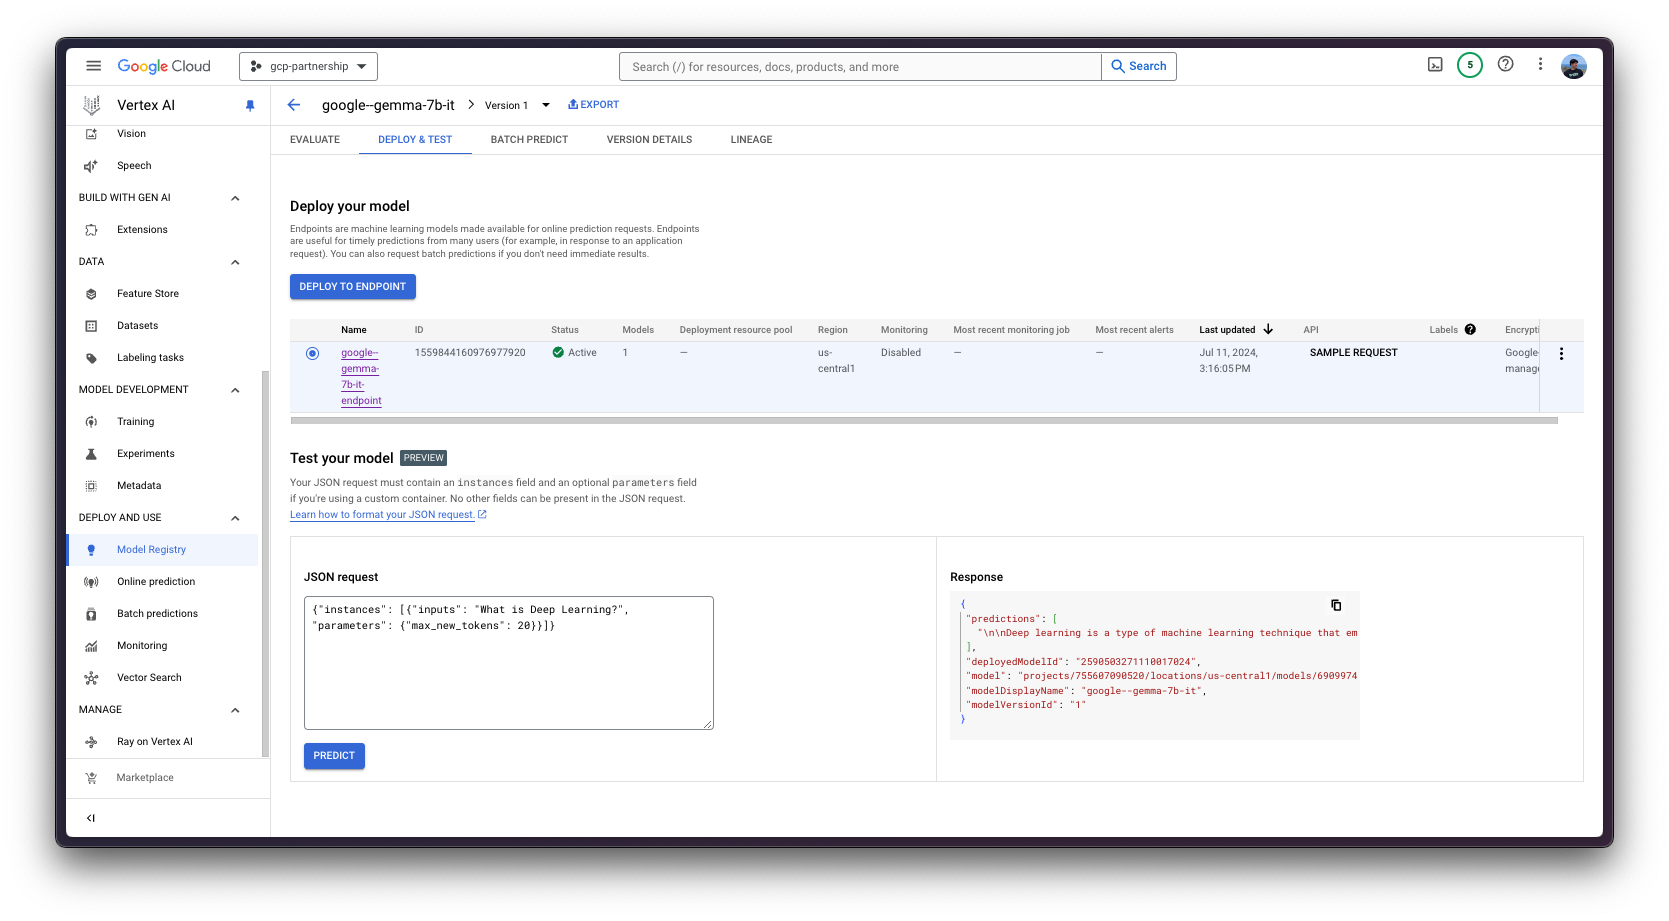
Via the Vertex AI Online Prediction UI
Alternatively, for testing purposes you can also use the Vertex AI Online Prediction UI, that provides a field that expects the JSON payload formatted according to the Vertex AI specification (as in the examples above) being:
{
    "instances": [
        {
            "inputs": "<bos><start_of_turn>user\nWhat's Deep Learning?<end_of_turn>\n<start_of_turn>model\n",
            "parameters": {
                "max_new_tokens": 128,
                "do_sample": true,
                "top_p": 0.95,
                "temperature": 0.7
            }
        }
    ]
}
Resource clean-up
Finally, you can already release the resources that you’ve created as follows, to avoid unnecessary costs:
deployed_model.undeploy_allto undeploy the model from all the endpoints.deployed_model.deleteto delete the endpoint/s where the model was deployed gracefully, after theundeploy_allmethod.model.deleteto delete the model from the registry.
When deleting the model from Vertex AI, as it’s stored within a GCS Bucket, neither the bucket nor its contents will be removed when removing the model from Vertex AI.
deployed_model.undeploy_all()
deployed_model.delete()
model.delete()
Alternatively, you can also remove those from the Google Cloud Console following the steps:
- Go to Vertex AI in Google Cloud
- Go to Deploy and use -> Online prediction
- Click on the endpoint and then on the deployed model/s to “Undeploy model from endpoint”
- Then go back to the endpoint list and remove the endpoint
- Finally, go to Deploy and use -> Model Registry, and remove the model
Additionally, you may also want to remove the GCS Bucket, to do so, you can use the following gcloud command:
!gcloud storage rm -r $BUCKET_URI
Or, alternatively, just remove the bucket and/or its contents from the Google Cloud Console.
📍 Find the complete example on GitHub here!